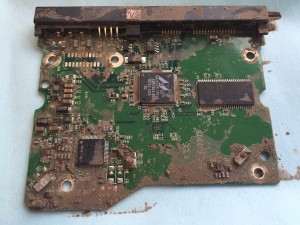
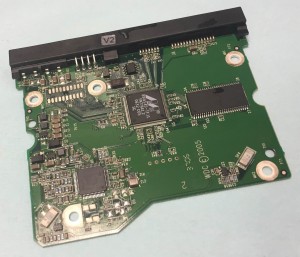
Sometimes before we can begin to extract the data from a broken phone or hard drive, it’s necessary to physically clean the device and remove the grime and grit that has caked itself onto various components and circuits – this is particularly true when liquids (water, coffee, wine, fruit drinks etc) are involved. Perhaps the device has been dropped into a puddle, been submerged in water, or has had a liquid spilt over it.
Common mishaps such as dropping a phone into water, or spilling liquid onto a hard drive will often cause the device to short circuit. When this happens, the device switches off instantly and access to the data stored on it is lost. Moreover, oxidisation begins immediately which attacks the components and circuit board. Furthermore, if the liquid involved is dirty (for example a phone has been dropped into a muddy puddle), dirt and grime will also contaminate the device. As the phone / hard drive begins to dry out, this dirt and grime sticks to the electronic components which are now also oxidising. This process causes all sorts of electrical issues and prevents the device from functioning.
Ultrasonically cleaning the components is a great way of removing all the dirt, grime and oxidation that builds up. We have had great results using ultrasonic cleaning techniques to bring both phones and hard drives back to life so we can recover the information on them. It’s possible to restore parts to a ‘like new’ condition with the right detergent/solvent without damaging the part.
How Does Ultrasonic Cleaning Work?
The ultrasonic cleaning process produces a physical effect known as “acoustic cavitation” which form when ultrasonic waves travel through liquid. Sound waves stretch and compress liquid resulting in negative pressure which in turn creates the cavities in the water. As these cavities collapse, high temperatures and large forces are generated in the localised area and the cumulative effect of millions of these cavities forming and collapsing simultaneously is responsible for the cleaning action. Cavitation takes place wherever the liquid comes into contact with the object being cleaned.
It is generally safe to clean most electronic components ultrasonically and approximately 20 minutes is enough to loosen and remove most of the grime and oxidation from the affected part.
Case Study – Cleaning a Dirty Hard Drive Circuit Board
This is a PCB from a Western Digital hard drive that had been left outside in the wind and rain. You can see the mess it is in, and using a sponge or towel to clean the circuit board will only make things worse. Therefore, the best way is to ultrasonically clean the circuit board.
Video 1
The PCB is put into the ultrasonic cleaner and set to a 5 minute low intensity clean.
Ultrasonic PCB Clean 1 from Chris Seeley on Vimeo.
Video 2
Notice the particles of dirt coming off the PCB when the camera zooms in.
Ultrasonic PCB Clean 2 from Chris Seeley on Vimeo.
After the ultrasonic clean has finished the circuit board is put into a sealed unit with drying materials to absorb any remaining moisture. Once thoroughly dry the circuit board is reconnected to the hard drive and the hard drive springs into life.
Using Ultrasonic Cleaning To Recover Data
Data Clinic regularly use ultrasonic cleaning methods to recover data from phones and hard drives, particularly when liquids are involved. Learn more about our hard drive recovery and phone data recovery here.


